|
What You’ll Need:
* Toothpicks *Glaze * Acrylic paints * Petroleum jelly *Floral Foam * Decorative paper *Wire or necklace string *Damp rag *Crafting Glue
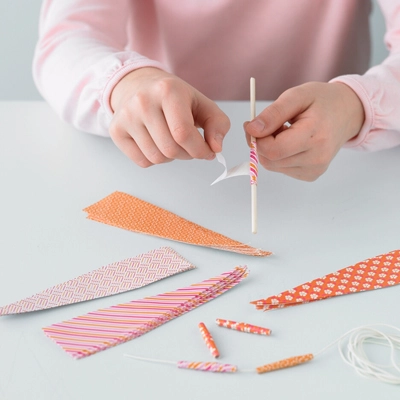
2) This is the part when things start to get messy (or as I like to think of it, when the fun begins!) Using your hands and fingers, generously coat each piece of paper in crafting glue. Lay them out on a cleared surface lightly. Then use the wet rag to wipe your hands quickly clean.
3) Get out a toothpick and dip one end in the petroleum jelly. This will keep the glue from sticking to the toothpick. Beginning at the wide end of your triangular strip, tightly twist the strip around the toothpick. When finished, stick the unused tip of the toothpick in your floral foam so it can dry. Repeat for all remaining beads.
4) After all of your beads have dried, it’s time to add the finishing touches. Get out your paints and paintbrushes. Paint some fun designs to make each bead unique and special. Coat each bead with glaze so it’s shinny and professional.
5) Once the glaze and paints are dry, add your new handmade beads to a necklace or bracelet for a fun accessory! |
Thanks for reading, and remember to always buy handmade!
-Sara


Leave a comment